What Is the Best UV Resin Wood Varnish?

Time:2026-11-19 Author:Aria
0%

Choosing the best Uv Resin Wood Varnish depends on the wood, the project, and the finish you want. A glossy tabletop has different needs from a small carved ornament. UV resin can create a clear, hard-looking surface, but it is not simply a traditional varnish under another name. It cures when exposed to suitable UV light, so layer thickness, resin clarity, and lamp strength can all affect the result. Small details matter.

This guide looks at practical factors: surface preparation, ease of application, curing, durability, and appearance over time. A clean, dry sanding surface helps reduce visible bumps and trapped dust. Testing a small hidden area is wise, especially on stained, oily, or unusually colored wood. Some resins may yellow, scratch, or cure unevenly if applied too thickly or exposed to insufficient light. Results can vary. That part is easy to underestimate.

Product claims are useful, but they do not replace checking the manufacturer’s instructions or testing the resin with your own lamp and wood. We’ll compare what different finishes offer and where their limits show up in everyday use. The best option is not always the shiniest one. It should suit the object, the working conditions, and the amount of maintenance you can accept. I would still treat any recommendation as a starting point, not a guarantee.
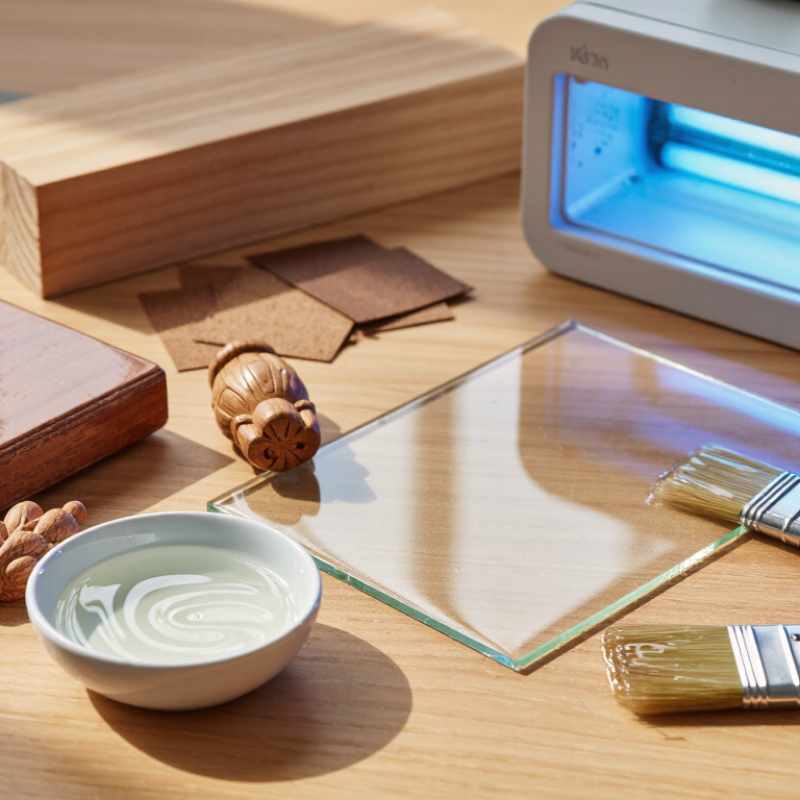
What Is the Best UV Resin Wood Varnish?

What UV Resin Wood Varnish Is and How It Cures

UV resin wood varnish is a clear, liquid coating that hardens when exposed to suitable ultraviolet light. Unlike a conventional finish that dries mainly as solvents evaporate, it cures through a light-triggered chemical reaction. The resin contains compounds that respond to UV energy and link together into a solid film. That matters. Once cured, the surface can feel smooth and glossy, but the result depends on the wood, coating thickness, and light reaching every area.

Wood preparation is easy to underestimate. Sand the surface evenly, remove dust, and make sure the timber is dry; trapped moisture or debris can spoil clarity. Apply a thin, even layer rather than one thick pour. Thin coats are easier to cure fully, especially near edges and grain.

Not always. A deep recess or shaded spot may receive too little light, leaving resin soft or tacky beneath the surface. Use a curing lamp suited to the resin’s stated wavelength, and follow its timing guidance instead of guessing. I would also test a small offcut first: wood can darken, and a glossy finish makes scratches more visible. Wear appropriate protective gloves and provide good ventilation while applying and curing the coating.

How UV Resin Varnish Differs from Traditional Wood Finishes

UV-cured resin and traditional wood finishes protect wood in different ways. A UV system forms a hard polymer film when suitable light activates its photoinitiator. Oil finishes generally cure through oxidation; many water- or solvent-based coatings dry as their carriers evaporate. The distinction affects more than drying time. UV curing can be fast, but light must reach the resin evenly. Deep pours, corners, or heavily pigmented layers may remain soft. That matters. On a tabletop, a thick resin coat can feel glassy, while a thin traditional finish leaves more grain texture under your fingertips. Resin formulations also vary in scratch resistance and color stability.

Wood movement remains a concern with either finish. The USDA Forest Products Laboratory’s Wood Handbook reports that, at 70°F, wood’s equilibrium moisture content is about 6.2% at 30% relative humidity and 20.5% at 90% .

A coating can slow moisture exchange, but it cannot stop the board responding to its surroundings. For practical work, test the finish on an offcut, especially when the wood has end grain or uneven pores. Check cure at the thickest point, not just the surface.

I would not assume a shiny, hard top means the whole layer cured properly; that shortcut can disappoint.

Key Features to Compare When Choosing a UV Resin Varnish

What Is the Best UV Resin Wood Varnish?
Key Features to Compare When Choosing a UV Resin Varnish

The best choice depends on the wood, the finish you want, and your curing setup. Compare clarity and resistance to yellowing, especially for pale woods such as maple. Check viscosity too: thinner resin can flow into carved details, while thicker resin may stay put on a tabletop edge. Neither is automatically better. A glossy surface can also make scratches more visible.

Look for product instructions that specify suitable surfaces, recommended layer thickness, and the required UV light wavelength and exposure time. UV light may not reach resin beneath opaque pigments, deep grooves, or overly thick layers. Adhesion matters as well; a smooth, sealed surface may need different preparation than bare, sanded wood. Test on an offcut first. It can reveal bubbles, raised grain, or an unexpected color shift before you coat the finished piece.

Tips: Keep the wood dry and dust-free. Apply a thin test layer, then cure it exactly as directed. Check the underside or a hidden area for tackiness; a hard-looking surface is not always fully cured. Wear the protective equipment specified by the product maker, and allow ventilation where instructed. One thing is easy to overlook: the “best” finish may still need repair if the object gets heavy wear.

What Is the Best UV Resin Wood Varnish? — Key Features to Compare When Choosing a UV Resin Varnish
Feature UV-Curable Resin Coating Water-Based Polyurethane Oil-Based Polyurethane What to Look For
How it cures Cures when exposed to a compatible UV or LED light; the required wavelength and exposure depend on the formulation. Dries as water evaporates, then develops its final film properties over time. Dries through solvent evaporation and oxidative curing; full cure takes longer than surface drying. Check the coating’s cure instructions and confirm that your lamp’s wavelength and output are suitable.
Typical cure or drying time Can cure in seconds to minutes under a matched light source, but thick, shaded, or pigmented areas may need more time or may not cure fully. Often touch-dry within hours; recoating and full cure vary by product and conditions. Often touch-dry within hours; full cure commonly takes several days or longer. Use the stated cure schedule, including recommended light distance, exposure, temperature, and recoat interval.
Best application thickness Usually suited to controlled, relatively thin coats. Thick pours can block light and leave uncured material beneath the surface. Applied in multiple thin coats for an even protective film. Applied in multiple coats; sanding between coats may be recommended. For UV coatings, verify the maximum coat thickness and whether the product is intended for brushing, rolling, or spraying.
Wood preparation Wood should be clean, dry, and suitably smooth. Porous grain may need sealing to reduce bubbles and uneven absorption. Requires a clean, dry, sanded surface; follow directions for bare or previously finished wood. Requires a clean, dry surface; sanding helps provide consistent adhesion and appearance. Test on a small area, especially on oily, resinous, stained, or previously coated wood.
Light access during curing Light must reach the coating. Deep grain, joints, opaque pigments, and shadowed areas can prevent complete curing. Does not require a UV lamp to dry. Does not require a UV lamp to dry. Choose a non-UV finish if the workpiece has areas that cannot be illuminated reliably.
Appearance and film build Can form a clear, glossy, relatively thick-looking surface, depending on formulation and application. Available in different sheen levels; typically builds through several coats. Often adds a warmer or amber tone, which may become more noticeable with time. Check a cured sample for clarity, color change, gloss, and how the finish looks on the specific wood species.
Scratch and wear resistance Varies widely by resin chemistry and cure quality; a hard surface is not automatically impact-proof or scratch-proof. Depends on formulation and number of coats; commonly used for furniture and interior woodwork. Depends on formulation and cure; commonly used where a traditional, durable film finish is desired. Compare the manufacturer’s tested performance and intended use rather than relying on “hard” or “durable” alone.
Sunlight and outdoor use UV exposure during curing is different from long-term sunlight resistance. Exterior suitability depends on the specific formulation. Some products are formulated for exterior use; interior versions should not be assumed suitable outdoors. Some products are formulated for exterior use; weather resistance varies by product. For outdoor wood, select a finish explicitly rated for exterior exposure and follow its maintenance schedule.
Equipment and safety Requires a compatible UV light and careful handling of uncured resin; follow label directions and avoid skin or eye exposure. Usually applied with common finishing tools; ventilation and protective equipment depend on the product label. Solvent-containing products may require strong ventilation and careful handling; follow the safety data sheet. Review the product label and safety data sheet for ventilation, gloves, eye protection, cleanup, and disposal requirements.
Most suitable situations Small projects or surfaces where fast, controlled light curing and access to a compatible lamp are practical. Interior furniture and woodwork when a water-based finish is preferred. Projects where a traditional film finish and warmer appearance are desired. Match the finish to the project size, desired appearance, exposure, equipment, and application conditions.
Note: Performance, application thickness, cure time, and suitability vary by formulation and working conditions. Always follow the specific product label and test the finish on a sample before coating the full project.

How to Select the Best UV Resin Varnish for Your Wood Project

What Is the Best UV Resin Wood Varnish?

How to Select the Best UV Resin Varnish for Your Wood Project

The best choice depends on the wood, the finished item, and your curing setup. For a tabletop, prioritize abrasion resistance and a finish that levels smoothly. For carved details, a thinner resin may reach narrow grooves more easily. Check the product’s recommended UV wavelength and layer thickness against your lamp. Pigments, deep pours, and dark wood can limit light penetration, leaving the surface tacky while deeper areas remain undercured. Test a small offcut.

Wood moisture matters, too. The USDA Forest Products Laboratory’s Wood Handbook (FPL-GTR-282, 2021) shows equilibrium moisture content near 6–8% at 70°F and 30–40% relative humidity. That range can help guide preparation for indoor projects, though local conditions vary. Let the wood acclimate, sand evenly, and remove dust before coating. Gloss can distract from fit; it is easy to overlook how much the resin changes the wood’s natural color. Apply a thin layer, cure it as directed, then inspect the surface and the edges. If adhesion or cure looks uneven, adjust your preparation before coating the whole piece. A test takes time. So does fixing a failed finish.

How to Apply and Cure UV Resin Varnish Safely

What Is the Best UV Resin Wood Varnish?

How to Apply and Cure UV Resin Varnish Safely

A good UV resin varnish should suit your wood, lamp wavelength, and intended finish. Check its technical data sheet and safety data sheet before opening the container. Sand the wood smooth, remove dust, and test a hidden area. Porous grain can absorb resin unevenly, so the first coat may look patchy. Thin coats matter.

Apply a light, even layer in a well-ventilated workspace. Keep resin off skin and wear protective gloves and eye protection recommended by the safety data sheet. Cure with the specified lamp at the stated distance and for the stated time. Thick layers, dark pigments, and deep grain can block UV light. A shiny surface does not prove the resin underneath has cured. Never guess.

For context, ICNIRP’s 2004 guidelines set an occupational limit of 30 J/m² of effective UV exposure over an eight-hour period. This is a general exposure benchmark, not a safe curing-time calculation for every lamp. Shield the lamp, avoid looking directly at it, and follow the lamp and resin instructions.

Let the finish cool, then check for tackiness or soft spots before handling. If a test piece stays sticky, pause and reassess the layer thickness, lamp distance, and cure time.

FAQS

How does UV-cured resin harden on wood?

Suitable UV light activates the resin’s photoinitiator and forms a hard polymer film. Light must reach the layer evenly.

How is UV resin different from oil finishes?

UV resin cures through light activation. Oil finishes generally cure through oxidation, while some other coatings dry as their carriers evaporate.

Can a thick resin coat cure completely?

Not always. Deep pours, corners, and heavily pigmented areas may stay soft if light cannot reach them well.

Does a glossy finish hide scratches?

No. Gloss can make scratches easier to see. A thick resin coat may feel glassy, while a thinner finish leaves more wood grain noticeable.

How should I choose a resin for pale wood?

Check clarity and resistance to yellowing, especially on maple. Test a small offcut first; color shifts can be surprising.

Does resin viscosity matter?

Yes. Thinner resin can flow into carved details, while thicker resin may stay on a tabletop edge. Neither is always better.

How can I check whether the resin cured fully?

Follow the specified light wavelength, exposure time, and layer thickness. Check the thickest point and a hidden area for tackiness. A hard surface can mislead.

Can a finish prevent wood from reacting to humidity?

No. A coating can slow moisture exchange, but wood still responds to its surroundings. Keep the wood dry and test the finish before coating the whole piece.

Conclusion

Uv Resin Wood Varnish is a clear protective coating that hardens when exposed to suitable ultraviolet light. Unlike traditional wood finishes that may dry through evaporation or chemical reaction over a longer period, UV resin varnish can cure quickly when applied in an appropriate layer and illuminated evenly. Its performance depends on factors such as clarity, hardness, adhesion, scratch resistance, and how well it suits the wood and the project’s intended use.

To choose a suitable varnish, consider the surface, desired finish, application method, and the curing equipment available. Prepare the wood carefully, apply a thin, even coat, and follow the product’s instructions for exposure time and coverage. Work in a well-ventilated area, protect your skin and eyes, and avoid looking directly at UV light. Allow the coating to cure fully before handling or using the finished piece.


Aria

Aria

Aria is a dedicated marketing professional with a deep passion for innovative strategies and a keen understanding of our company's product offerings. With a wealth of experience in the industry, Aria excels at crafting engaging content that highlights the unique features and benefits of our......