Why Choose UV Resin Wood Lacquer for Wood Finishing?

Time:2026-11-19 Author:Sienna
0%

A wood finish should protect the surface while letting its grain remain visible. Uv Resin Wood Lacquer is one option for achieving a smooth, durable-looking coating, especially when a fast curing process suits the project. Under ultraviolet light, the resin hardens quickly, helping reduce the wait between application and handling. That can be useful on cabinet doors, small furniture parts, and decorative panels.

Fast does not mean effortless. The coating’s appearance depends on clean wood, even application, and suitable curing conditions. Dust caught in a glossy layer can stand out like grit beneath glass. Uneven coats may also create dull patches or visible edges. Looks easy. But surface preparation still matters, and product instructions should guide the process.

Before coating a full piece, test the lacquer on a scrap of the same wood. Check how the color and grain look after curing, and whether the finish feels right for the intended use. Follow the manufacturer’s guidance for application, UV exposure, ventilation, and protective equipment. These details vary by product, so general advice cannot replace its technical sheet. It is tempting to assume that a harder finish is always better; that assumption deserves a test. A very glossy surface may not suit every room or repair. This guide explores the practical benefits, limitations, and selection factors behind UV resin wood lacquer, so readers can make a more informed finishing choice.
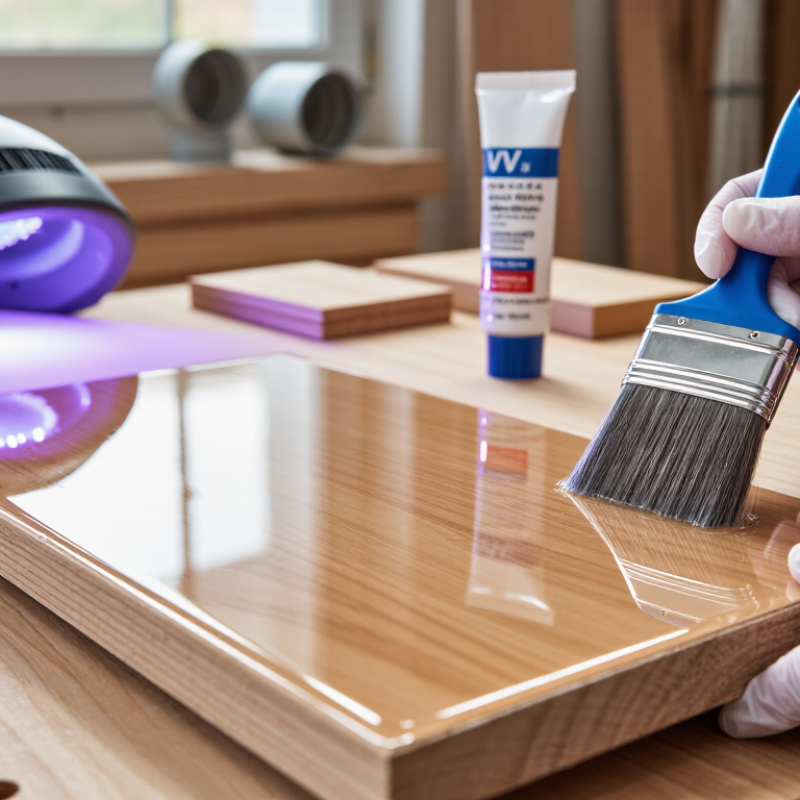
Why Choose UV Resin Wood Lacquer for Wood Finishing?

UV Resin Chemistry: 100%-Solids Formulations and Photoinitiator Basics

UV resin wood lacquer is built around reactive resins and other ingredients that harden under ultraviolet light. In a 100%-solids formulation, little or no volatile solvent evaporates during application. That matters. More of the applied material can remain as a film, though transfer losses and incomplete curing still affect the result.

Photoinitiators start the curing reaction by absorbing light at suitable wavelengths. They generate reactive species that link resin molecules into a solid network. The lamp’s wavelength, distance, and exposure time must match the formulation. A glossy surface can look cured while deeper areas remain soft, especially under heavy coats or dark pigments. Not always obvious.

On a sanded wood panel, a thin, even coat is easier to cure than a thick pool around an edge. Grain differences can also change how lacquer spreads and reflects light. I would test a small offcut, then check the surface and edges after curing. This adds time, but skipping the test can leave tacky patches or uneven gloss. UV chemistry is efficient, not magic; the wood, coating thickness, and light all matter.

Wood Preparation: Moisture Testing Under ASTM D4442 and Surface Sanding

Why Choose UV Resin Wood Lacquer for Wood Finishing?

Wood Preparation: Moisture Testing Under ASTM D4442 and Surface Sanding

A smooth UV resin wood lacquer finish starts before the coating reaches the timber. Wood moisture can change after application, causing movement that stresses the finish. Check several locations, including board ends and areas near knots. A handheld meter is useful for screening, but readings vary by species and temperature. ASTM D4442 describes direct methods for measuring moisture content, including oven-dry testing. Use the method and equipment suited to the material, and record the results.

Sanding matters just as much. Remove old finish and flatten raised grain with an appropriate abrasive sequence. A common approach is to start around 80–120 grit, then refine toward 150–180 grit, unless the coating supplier specifies otherwise. Clear away dust from pores and edges; leftover particles can show beneath a glossy surface. Do not over-sand. I have found that extra polishing can make some surfaces less receptive, and the result is not always obvious until coating begins.

Tips: Let boards acclimate in the finishing area, then retest. Sand with the grain, inspect under angled light, and check a small test panel. Small differences matter.

UV Curing: 365–395 nm LED Wavelengths and UV Dose in mJ/cm²

Why Choose UV Resin Wood Lacquer for Wood Finishing?

UV resin wood lacquer can cure quickly and create a clear, durable-looking surface. Its performance depends on more than lamp power. The photoinitiator in the coating must respond to the lamp’s wavelength, often within the 365–395 nm range. A mismatch can leave the surface tacky or the layer undercured. Small details matter.

UV dose is the energy reaching each square centimeter, measured in mJ/cm². It depends on irradiance and exposure time, so a longer cure does not always fix weak or uneven light. Distance, lamp angle, wood color, and coating thickness can all affect the dose. For example, a deep groove may receive less light than a flat panel. Follow the coating supplier’s cure specifications, and test the actual setup on a sample. I might expect one pass to be enough, but shaded areas can prove otherwise.

Tips: Keep the lamp at a consistent distance and avoid overlapping passes unevenly. Measure dose with a suitable radiometer when available. Test before scaling. Check the surface and, where appropriate, the cured layer beneath it; a dry feel alone does not confirm a complete cure.

Finish Testing: ASTM D3359 Adhesion, D4060 Abrasion, and D523 Gloss

Why Choose UV Resin Wood Lacquer for Wood Finishing?

A UV resin wood lacquer can cure quickly, but a glossy surface alone does not prove durable finishing. Test adhesion after the coating has fully cured and the wood has been conditioned. ASTM D3359 uses a cross-cut or X-cut and pressure-sensitive tape to assess coating removal. On wood, grain, pores, and uneven surfaces can affect the result. Record the method, coating thickness, and rating; do not compare results from different setups as if they were identical. Small details matter.

Abrasion testing under ASTM D4060 uses rotating wheels to wear a coated specimen. Report the wheel type, load, cycle count, and weight loss, since each can change the outcome. For ASTM D523 gloss readings, note the measurement angle and take readings at several points. Wood grain may create uneven reflections. I would not treat one high gloss reading as proof of consistent appearance. A practical comparison uses the same wood species, sanding schedule, application amount, and curing conditions for every sample. It is easy to overlook one variable. Record it anyway. Testing cannot reproduce every scratch, spill, or handling habit in daily use, but it gives finishers a clearer basis for choosing a coating.

Why Choose UV Resin Wood Lacquer for Wood Finishing? - Finish Testing: ASTM D3359 Adhesion, D4060 Abrasion, and D523 Gloss

Testing reference table for documenting a UV-cured wood finish. No specimen results are provided; enter values measured on the actual coating and substrate.

Test area Standard and measured property Relevant test details Record for each specimen Result / reporting note
Adhesion ASTM D3359 — tape-test adhesion rating Method A uses an X-cut; Method B uses a cross-cut grid. The method and cut spacing depend on coating thickness and the applicable procedure. Substrate and preparation; coating thickness; method; cut spacing; tape and test conditions; rating. Report the applicable rating scale (0–5, with 5 indicating the best adhesion rating). ASTM D3359 is intended for metallic substrates; testing on wood requires a documented, validated adaptation and should not be represented as an unmodified standard test.
Abrasion resistance ASTM D4060 — Taber abrasion mass loss A coated specimen is abraded using selected Taber wheels and test conditions. Wheel type, applied load, and cycle count must be specified; the standard does not provide one universal setup for every coating. Wheel type; load; cycles; specimen conditioning; initial and final mass; visible wear or breakthrough. Mass loss = initial mass − final mass, typically reported in milligrams for the stated test conditions. Lower mass loss indicates less material loss in that test, but comparisons require the same setup and substrate.
Surface gloss ASTM D523 — specular gloss Gloss is measured at 20°, 60°, or 85° geometry. The 60° geometry is commonly used as a general-purpose measurement; 20° is useful for high-gloss surfaces and 85° for low-gloss surfaces. Measurement angle; instrument calibration; number and locations of readings; specimen conditioning; mean and variation. Report gloss units (GU) together with the measurement angle. Gloss values from different angles are not directly interchangeable.
UV curing record Process condition — UV exposure Document the UV source and actual exposure conditions. Irradiance and dose depend on the equipment, spectrum, distance, line speed, and coating formulation. Source spectrum or wavelength range; irradiance; exposure time or line speed; measured dose; film thickness; number of passes. Dose may be expressed in J/cm²; it is calculated from irradiance over exposure time using consistent units. Do not infer a universal cure dose without product- and equipment-specific validation.
Wood substrate record Specimen description and conditioning Wood species, grain direction, surface preparation, moisture condition, and coating build can affect finish-test results. Species; sanding sequence; moisture content if measured; sealer or primer; coating application method; dry-film thickness; conditioning environment. Include these details with every test report so results can be interpreted and compared meaningfully.

Note: Consult the current edition of each ASTM standard for its complete scope, apparatus requirements, specimen preparation, and reporting instructions.

Choosing a Wood Lacquer: VOC Levels, Cure Speed, and Repairability

When choosing a wood lacquer, look beyond the label. UV-curable finishes can have lower VOC emissions than some conventional coatings, but the chemistry varies. “UV” does not automatically mean zero VOC. Check the technical data and safety information for the specific product, and ventilate the work area as directed. Odor is not a reliable measure of exposure. A small test on the same wood is useful, especially when grain, stain, or earlier coatings may affect the result.

Cure speed is a major advantage, but it depends on more than the lamp. Film thickness, pigment, distance, and shaded corners can leave parts undercured. Follow the maker’s lamp and exposure guidance, then inspect edges and grooves. Fast, but conditional. On a scrap board, check whether the surface feels even before coating a larger piece; a quick surface cure can hide a softer layer beneath it.

Repairability deserves equal attention. A fully cured UV lacquer can be hard and durable, yet a local patch may show as a dull edge or a different sheen. Light sanding and careful recoating may help, but blending is not guaranteed. I would not assume a small scratch will disappear with one touch-up. Keep a sample piece for later color and gloss comparisons, and record the coating steps. That little note can save guesswork.

FAQS

Why should wood moisture be checked before applying UV resin lacquer?

Moisture changes can move boards and stress the finish. Check several spots, including board ends and areas near knots. Retest after acclimation. Small differences matter.

What does ASTM D4442 describe?

It covers direct methods for measuring wood moisture, including oven-dry testing. Handheld meters are useful for screening, but readings can vary with species and temperature. Record the method and results.

How should wood be sanded before coating?

A common sequence starts around 80–120 grit and refines toward 150–180 grit. Follow the coating instructions if they differ. Sand with the grain, remove dust, and inspect under angled light. Do not over-sand.

What wavelength range is often used for UV curing?

Many coatings respond to lamps in the 365–395 nm range. The coating’s photoinitiator must match the lamp wavelength. Test your actual setup first.

Why might a UV-cured surface feel tacky?

The wavelength may not match, or shaded areas may receive too little UV dose. Distance, lamp angle, coating thickness, and wood color can affect exposure. A dry feel alone does not confirm full cure.

What is UV dose, and why does it matter?

UV dose is energy reaching each square centimeter, measured in mJ/cm². It depends on irradiance and exposure time. Longer exposure may not fix weak or uneven light. Check grooves and edges.

How can coating adhesion be tested?

ASTM D3359 uses a cross-cut or X-cut with pressure-sensitive tape to assess coating removal. Wood grain and pores can affect results. Record the method, coating thickness, and rating.

What do abrasion and gloss tests reveal?

ASTM D4060 measures wear using rotating wheels; record wheel type, load, cycles, and weight loss. ASTM D523 measures gloss, so note the angle and take readings at several points. One shiny spot proves little. Use matching wood, sanding, application, and curing conditions for comparisons. Everyday scratches still vary.

Conclusion

Uv Resin Wood Lacquer offers a fast-curing finish by using a 100%-solids formulation and photoinitiators that react to ultraviolet light. A reliable result begins with careful wood preparation: check moisture content using an appropriate ASTM D4442 method, then sand the surface evenly so the coating can adhere consistently. During curing, match the lamp’s 365–395 nm wavelength to the resin system and apply an adequate UV dose, measured in mJ/cm², while ensuring the light reaches the coated surface.

After curing, evaluate performance with suitable tests, including ASTM D3359 for adhesion, ASTM D4060 for abrasion resistance, and ASTM D523 for gloss. When choosing a lacquer, compare VOC levels, curing speed, and how easily the finish can be repaired if damaged. Considering these factors together helps select a coating that suits the wood, the production process, and the desired appearance and durability.


Sienna

Sienna

Sienna is a skilled marketing professional with a deep expertise in our company’s core products and services. With a passion for innovation and detail, she plays a pivotal role in crafting insightful blog posts that not only highlight the unique features of our offerings but also provide valuable......